How important is bike set-up? In 1972 Eddy Merckx rode a standard track bike to the 1hr record of 49.43kph for an average power output of 455 watts. 24 Years later Chris Boardman rode an aerodynamic time trial bike to the record of 55.88kph for the average power output of 440 watts. Enough said. A standard road bike is responsible for 35% of total drag, a low profile bike is responsible for only 20% of total drag. The aim should always be to reduce the frontal surface area without compromising power output. With this in mind please read on.
The hip angle
Having spent many years fiddling with bike position for people of all different shapes and sizes -one thing is always blatantly apparent. To ride with good power and be comfortable the rider must maintain an open hip angle. After many sessions playing with computrainers and/or SRMs the results are, in nearly all cases, the same. If the rider maintains an effective open hip angle -no matter how low at the front -the rider will be able to produce good power for low aerobic cost. On the other hand, if the rider has a closed down position where he is too low at the front and too stretched out, the rider fails to produce the same power and the aerobic cost is greater as well.
Many people fail to see the significance between the hip angle and the length of the rider’s position but in my experience the two are linked. For example in a classic road position, the saddle is well back and rider spends most of the time riding on the brake hoods. In this position, even with seat well back on the rails, the rider maintains an open hip angle and is able to produce good power, when a pair of aerobars is applied the whole system gets thrown out because if the position is too long, the effective hip angle of the rider tends to close up ie. the riders thigh muscles come in contact with the torso. It becomes more difficult to breathe as the diaphragm is restricted and the pedal stroke is not as efficient because the rider cannot apply good force around the pedal stroke.
Ok what can you do about it?
Rear positions
First point is: with aerobars connected you must shorten the rider’s cockpit no matter whether the rider is in a forward position relative to the bottom bracket or a rear position. In a rear position you must use a handlebar stem short enough so that the rider can maintain his rear position but at the same time maintain his hip angle. In my experience, this usually has the rider’s ears directly above the elbows when sitting square in the saddle. This also then should be a short enough position for the rear position rider to still be able to apply good force to his pedal stroke in a comfortable position. For good road position, it is best to set the rider on the bike with cranks at horizontal 9-3, then drop a plumb bob from the rear of the patella. When set correctly the plumb bob should drop through the ball of the foot and the pedal axle.
Time trial bikes and forward positions
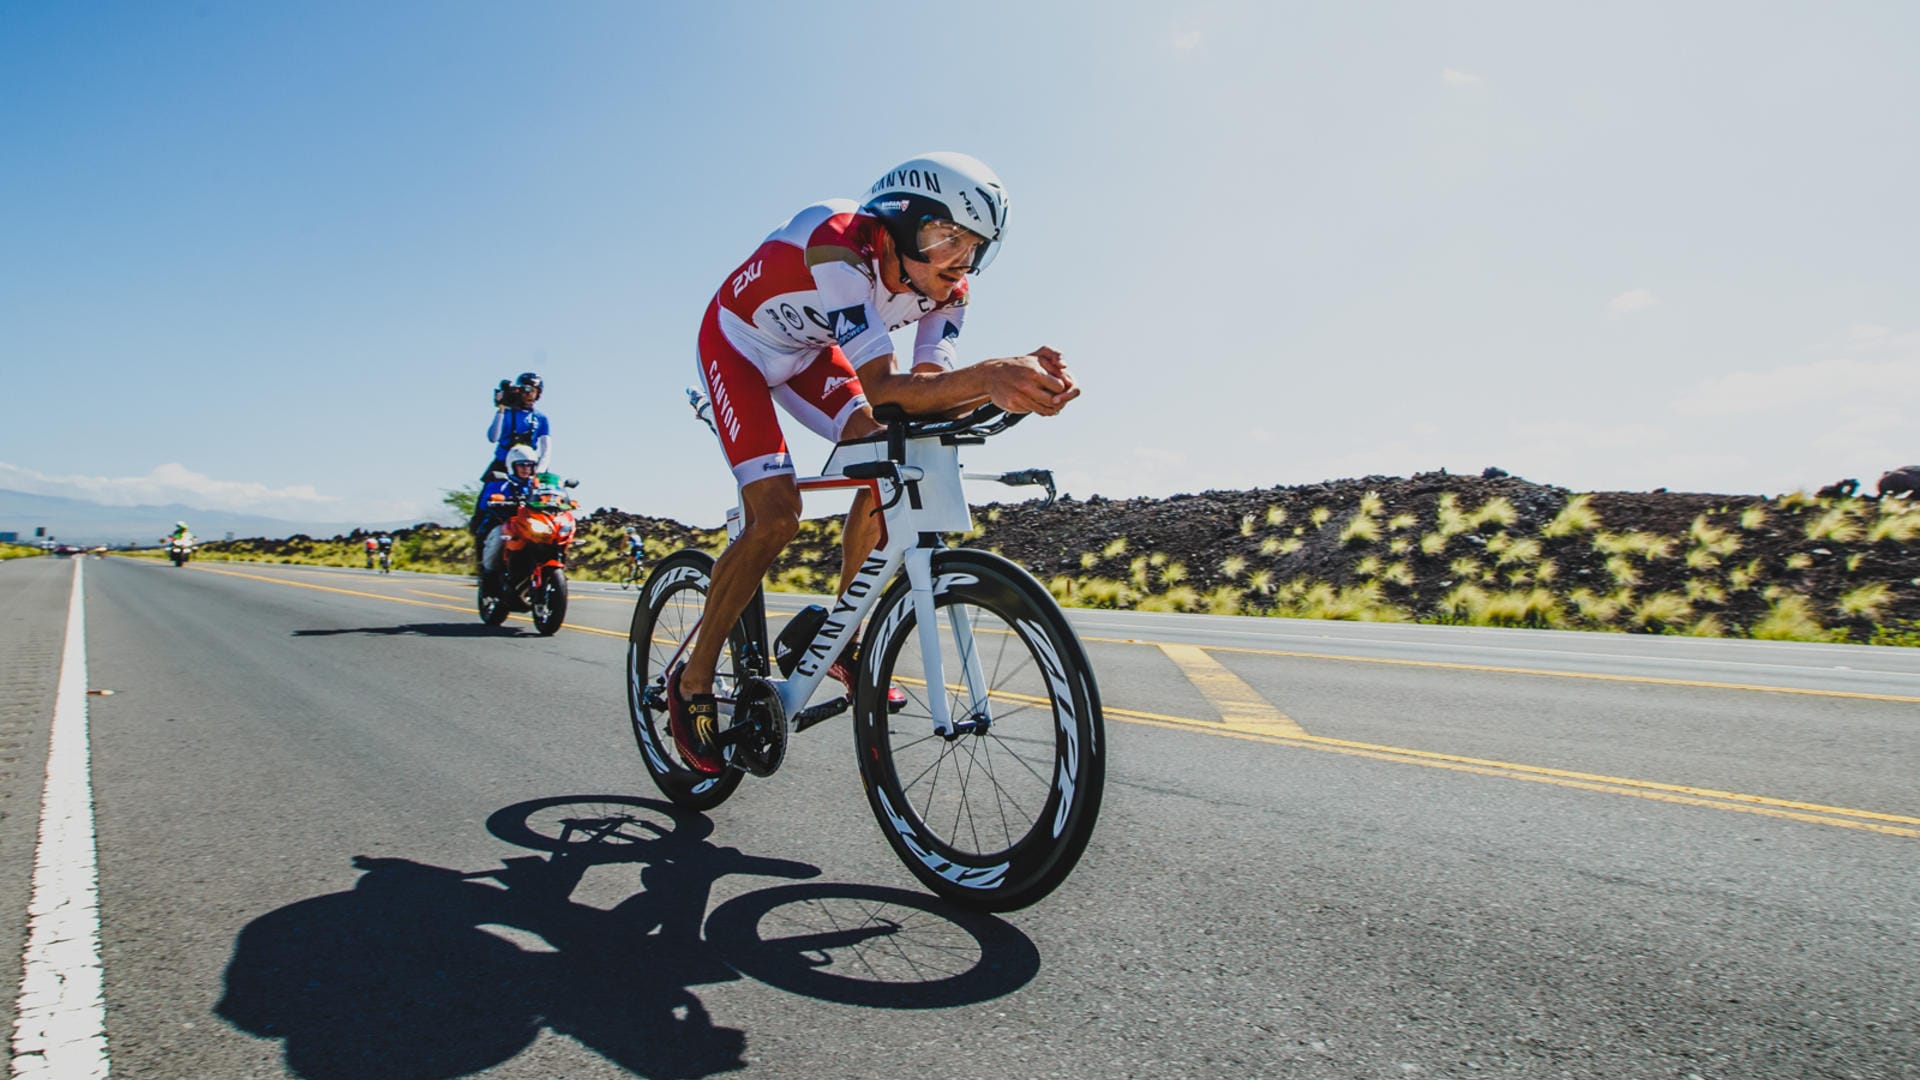
The great thing about purpose built time trial bikes is that they are made for aerodynamic positions, usually with shorter top tube measurements and steeper angled frames. This allows you to set the bike so that you are very low at the front creating great aerodynamics. The shorter top tube and the steeper frame geometry allows the rider to maintain his open hip angle while still very low at the front. This produces a great level of power, good comfort while still maintaining a great aerodynamic profile. No prizes for guessing what sort of bikes I think are best suited to time trial triathlon.
Retro fitting standard road frames to Time trial positions
Retro fitting a standard road angled bike for a forward position is possible but is a difficult set-up process – and you are fighting with position and handling – (ie) if you bring a rider forward on a standard road bike the handling of the bike can change. You then have to lower the front of the rider in order to lower their centre of gravity so they can achieve better control of the bike. Then again, to do that, you must have the shorter position to maintain the hip angle.
This is ok on the aerobars, but creates handling problems again for the rider when riding on the brake hoods or bars because the centre of gravity is too high at the front and too far forward. I have found the best way to face this problem is to install long cowhorn bars so the rider is more stretched and lower when on the bars for normal road miles and then nice and short for his aerobar position. I believe this is the best way to retro fit a standard road bike for Triathlon time trials. You are in essence rotating your position in an arc around the bottom bracket -forward and down.
Seat height
One area of bike set that always frustrated the hell out me is seat height – I must have tried a million different maths equations that I read or followed from text books or manuals and none of them ever seemed to be able to be applied to each person with any kind of reliability. One day I stumbled across and old article I read from an ex-pro rider who was so frustrated at bike set-up theory that he created his own simplified method. I liked how simple it was, so I started to experiment with it and found it to be amazingly accurate for almost all riders, whether they were on time trial bikes or road bikes. The method is very simple and can be done by the riders themselves if they have access to a full length mirror or a helper.
Put the rider on the bike on a turbo or similar, with hands holding the bars lightly get the rider to put one foot into the pedal and get them to have the opposite leg hanging over the other side of the bike unclipped. Important -you must check that the rider’s hips are square at all times throughout the process -best option is to put 2 small texta marks on each hip to line up and make sure they are in line. With the clipped in foot, the rider should position the crank at the same angle as the down tube, so the crank and the down tube are perfectly aligned. If it is a time trial bike without a down tube align as close as possible to the seat post, then get the rider to lock out their leg which is clipped into the pedal -again making sure the hips are square -adjust the seat height so that the ball of the foot and the heel are in a line parallel to the ground, then check the other foot in the same manner as the first.
I found this to be very accurate and far more simple/reliable than using maths equations. One thing to check though before hand is the riding style of the athlete, some athletes tend to drop their heels when they pedal and others maintain more downpointed toes. Considering this, I then adjust up or down slightly usually within 5 millimetres for differing riding styles. Now the above method is very accurate for time trial positions and the only change I make for road positions is to allow the heel to be slightly lower than the ball of the foot – say 5 mls and the result is nearly always the same – good effective pedalling that looks right.
Fore / Aft seat position
I like to set at 76-78 degrees from the horizontal, which for a 56cm frame is about 3cm behind the bottom bracket. Establish this by dropping a plumb bob off the tip of the seat and measure distance from the centre of the bottom bracket to the plumb bob. Note: I believe positions further forward of 78 degrees hamper pedal efficiency and damage running muscles. Again, much depends on how the whole fit comes together and whether the rider can achieve an effective open hip angle while on the aerobars.
Setting cockpit length
The simplest method I have found for aerobar positions is to set seat height, then the fore and aft of the seat, and then cockpit length. First then get the athlete standing next to the bike to put the back of their elbow against the tip of the saddle, with their arm and fingers outstretched -adjust the length so that the tips of their fingers are in the middle of the aerobar pads. Once you have done this put the athlete on the bike pedalling, make sure that their ears are in a line above or slightly in front of the elbows when they are in the aero position and that the hip angle is open as mentioned above. If the cockpit is longer than this ie. Ears behind elbows, I advise a shorter stem.
Cleat Position
I always set the athlete so the ball of the foot is directly over the pedal axle- how? Again, position the athlete on the bike with hands lightly on the bars or hoods, with both feet clipped in get the rider to bring their legs into position so the cranks are perfectly horizontal -position the riders foot manually so that the ball of their foot is the same height as the heel -when this is done the condial (bone)on the side of their foot should be squarely above the pedal axle or very slightly behind.check both feet to make sure they are the same. This method gives the rider a good level of leverage and crispness in the pedal stroke.
Frame size
Take your time when buying a bike and make sure it’s the right size, don’t let a salesman talk you into a bike or frame you are not sure about. If you are not totally clear on the matter do your research. Make absolutely sure it’s not too big. If it’s slightly small, that’s ok – some pros are even going a few sizes down for timetrialing on purpose for weight and stiffness benefits. If you end up with a bike that is too big it’s nearly impossible to make it work, so be extra careful. Don’t expect a bike salesman to be knowledgeable about time trial positions. If they have a road background they could sell you something completely inappropriate for the purpose especially if you are looking at long course triathlon.
Seat tilt
This is usually personal choice of where the seat feels best. Be aware that if the front of your seat is lifted slightly, your pelvis will be tilted away. This may create back problems. Most find that for time trialling they like to have the front of the seat flat. This is probably because when time trailling athletes tend to crawl out to the front of the seat when putting down high power loads in the aero position and there’s nothing worse than having your pelvis pushed back when you are trying to achieve high power outputs. Again though it seems to come down to personal choice but the above is a general outline.
In summary
- I have found that the best formula set is an effective angle of between 76-78 degrees and a short top tube to allow low aero positions with cowhorns bars.
- If your set-up feels like it’s lacking in power make sure you are short enough for an open hip angle and be careful of seat height as it can make a massive difference to power output and efficiency.
- If retro fitting road bikes make sure if you move forward that you also lower at the front or you will lose control of the bike. Or alternatively find a position that is not completely back but half way in between.
- Think of moving your position forward as rotating over the bottom bracket -so as you come forward -you also go lower so the movement forward is in an arc.
- Never buy a bike you think might be too big or you are unsure of -be patient.


