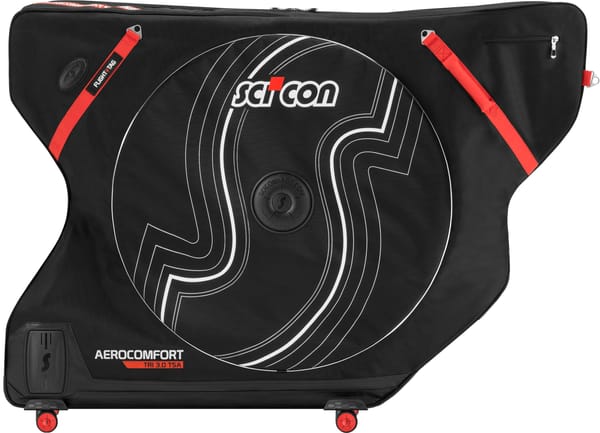
Review: Scicon AeroComfort 3.0 Travel Bag – Worth the Upgrade?
Review of the upgraded Scicon AreoComfort 3.0 bike travel bag from Scicon.

– 6 min read
Review of the upgraded Scicon AreoComfort 3.0 bike travel bag from Scicon.
Nothing worries triathletes more than traveling to a destination race with their bike. Losing your wallet, phone or first-born must be covered by travel insurance. But your bike? No such luxury. You only have to stand around the over-sized baggage area with the rest of your nervous brethren to see just how popular the Scicon Aerocomfort 3.0 travel bags are. Bag after bag being wheeled/thrown out by airline staff nervously greeted with a passion akin to welcoming a child into the family.
I’ve travelled with the Scicon Aerocomfort bags for several years, so I will focus not so much on reviewing the bag itself. If you’re travelling with a triathlon bike, get one. I will focus more on differences between the Aerocomfort 2.0 and 3.0 and whether or not there’s sufficient reason for an upgrade.
The Scicon Aerocomfort 2 has become the de-facto standard for soft shell padded travel bags. But with hard shell cases available, why do most triathletes travel with them? Well, with the growing trend of integrated headsets on aero frames, the ability for a rider to simply push their bars down to fit in a hard-shell simply isn’t there. Unless you’re paying for your mechanic’s holiday. Also, there is the question of weight. Something that can sting you if you travel internationally. Softshell bags simply weigh less. With sufficient planning, strategic purchasing of additional padding and the occasional prayer most triathletes can be assured their carbon child is in safe hands.
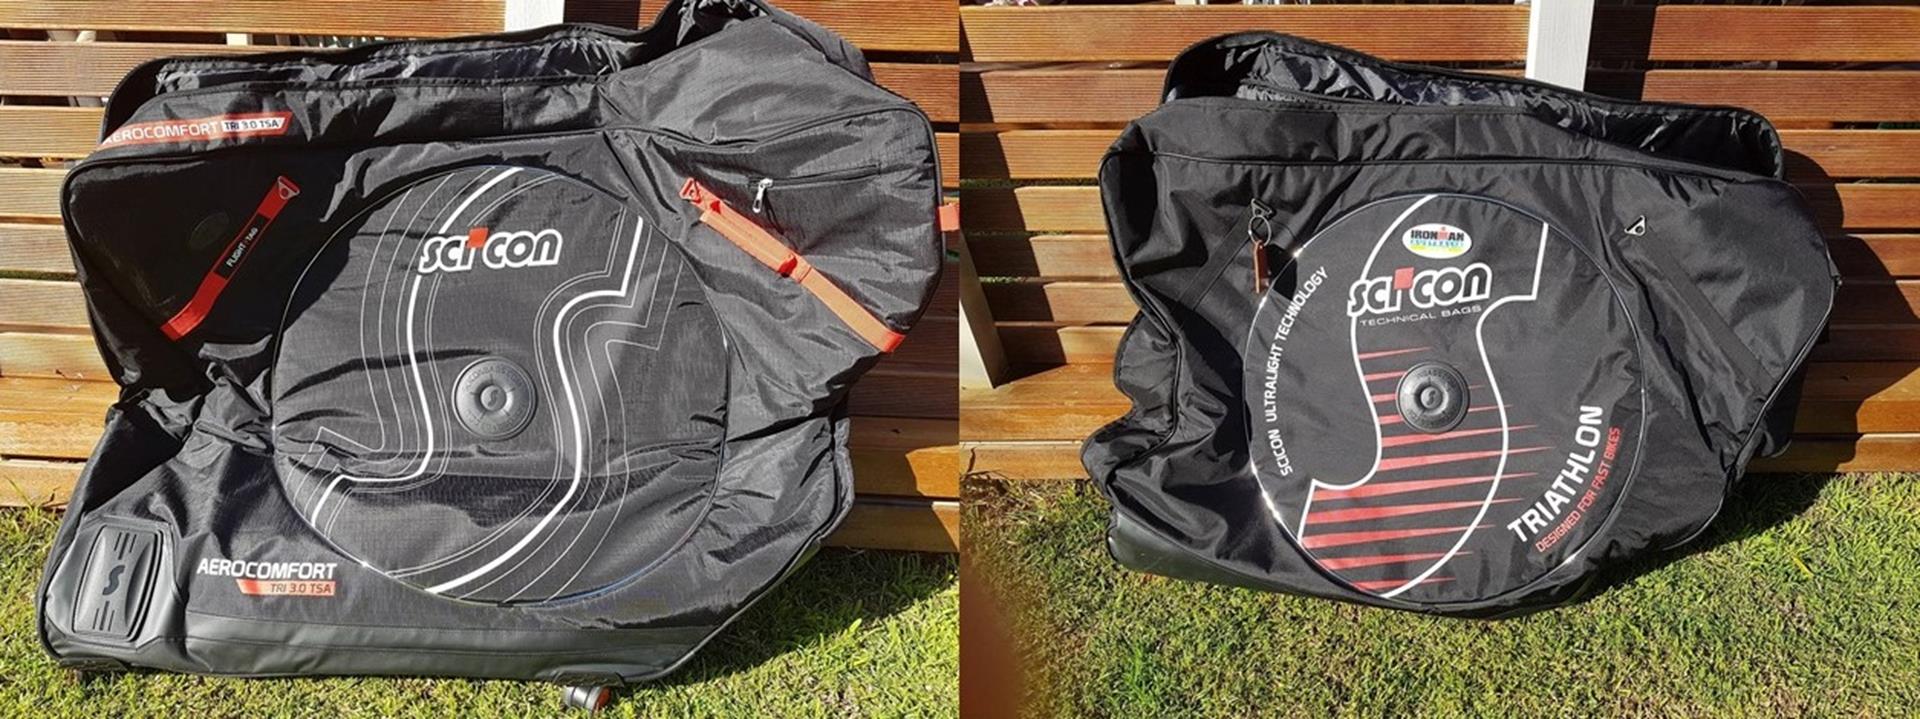
The first thing you will notice is the external bag build quality. Scicon have replaced the 840 Nylon with a new weave called Scicon D-TEX860. This Nylon seems more flexible but is also tougher and thicker whilst maintaining the 8kg weight. They have also added key reinforcement points where you tend to bang the bike on the base. I’ve heard several reports of the bag ripping at the points that Scicon have now re-enforced. I’m glad Scicon have listened – you can see this happening in the photos.
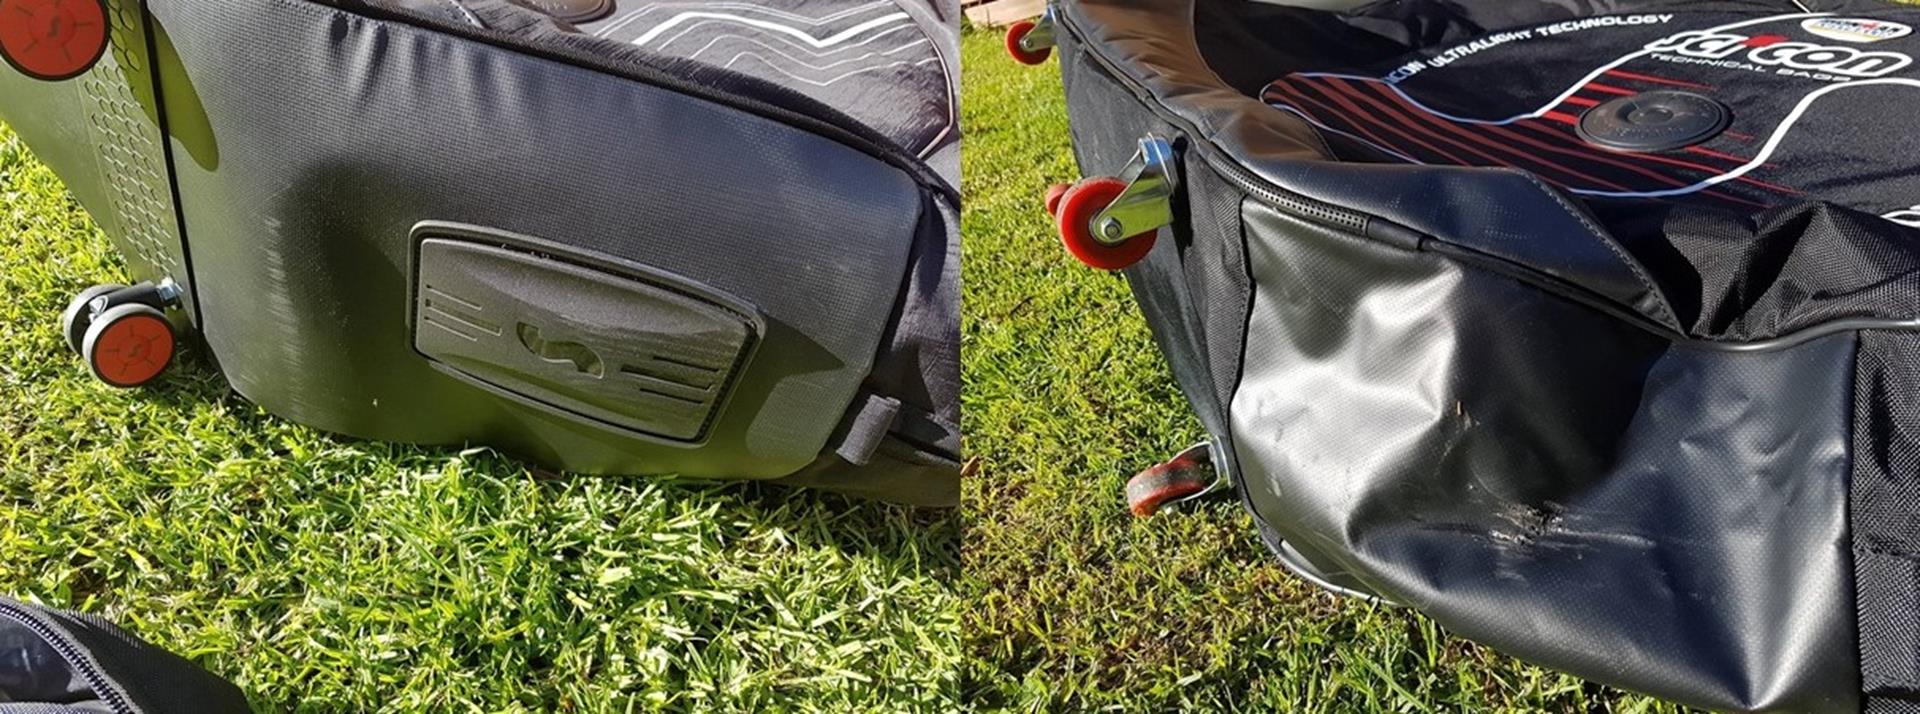
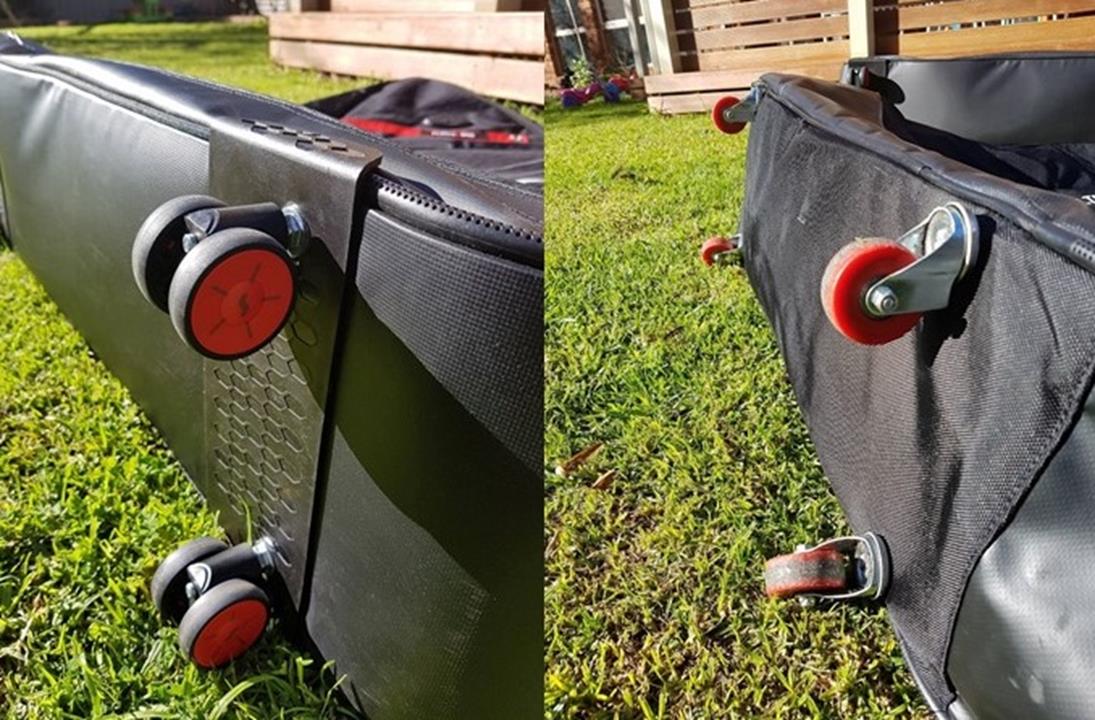
The second key improvement concerns the wheels. They are a big improvement and seem to respond no matter where you push the bike, freely rotating in 360 degrees. Previous versions of the bag could see you careering off in strange directions, given the often varied terrain that overseas travel brings.
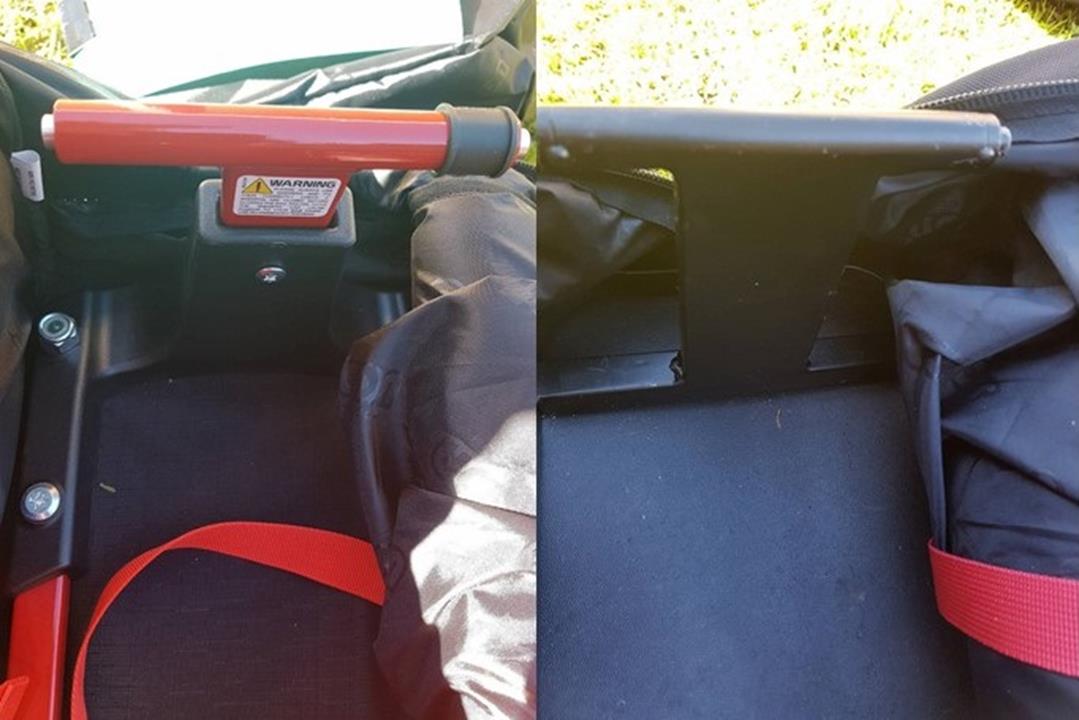
One of the big attractions of the Scicon Aerocomfort range of bags is the integrated mounted frame. Not only does the bike frame keep the front forks and rear dropouts stable but it also serves as a bike stand, allowing you to quickly assemble your bike at your destination. It’s certainly a very simple process to slot your bike into, with minimal fuss. In previous versions of the frame, the front forks were secured with a T-bar, which was not statically secured to the mount. This meant that it tended to wobble about a bit and could result in the front forks detaching from the frame. Scicon have now fixed this with the T-bar being secured to the mount via an adjustable screw which also aids assembly.
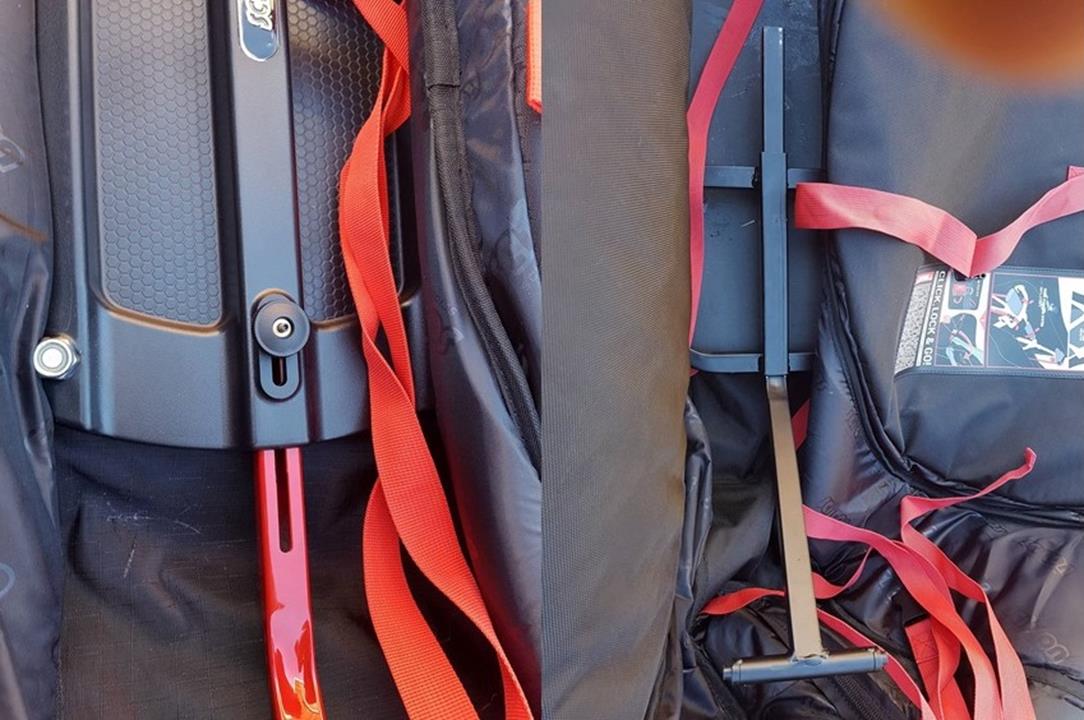
The bag also comes with a steel rear derailleur protector, which protects the mech from being damaged during transit. The chain is now kept out of the way via a new chain keeper function to hold the chain in place.
For you disc brake riders out there, the Scicon Aerocomfort 3.0 now supports thru axles, so no compatibility issues there.
As you can see in the photos, once the bike is secured in the mounted frame you simply place your wheels in the internal padded bags, hook up the jockey straps (now with tightening cords on both sides rather than one, a small detail but it helps when your tightening) and close the bag at the top.
I’m a 6ft 3 rider on a 58cm bike with aggressive reach out front and, true to the brochure, I have never had to adjust my bike… much. For larger riders, there isn’t enough space at the front of the bag to fit your aero bars in as you would ride them. The arm pads stick out too much, even with the additional 1cm of height this bag provides. It’s simply a matter of loosening the bars a little and turning them inward so the pads are inside the bars. Nothing major, just something to be aware of if you are a taller rider. Shorter riders don’t seem to have this problem.

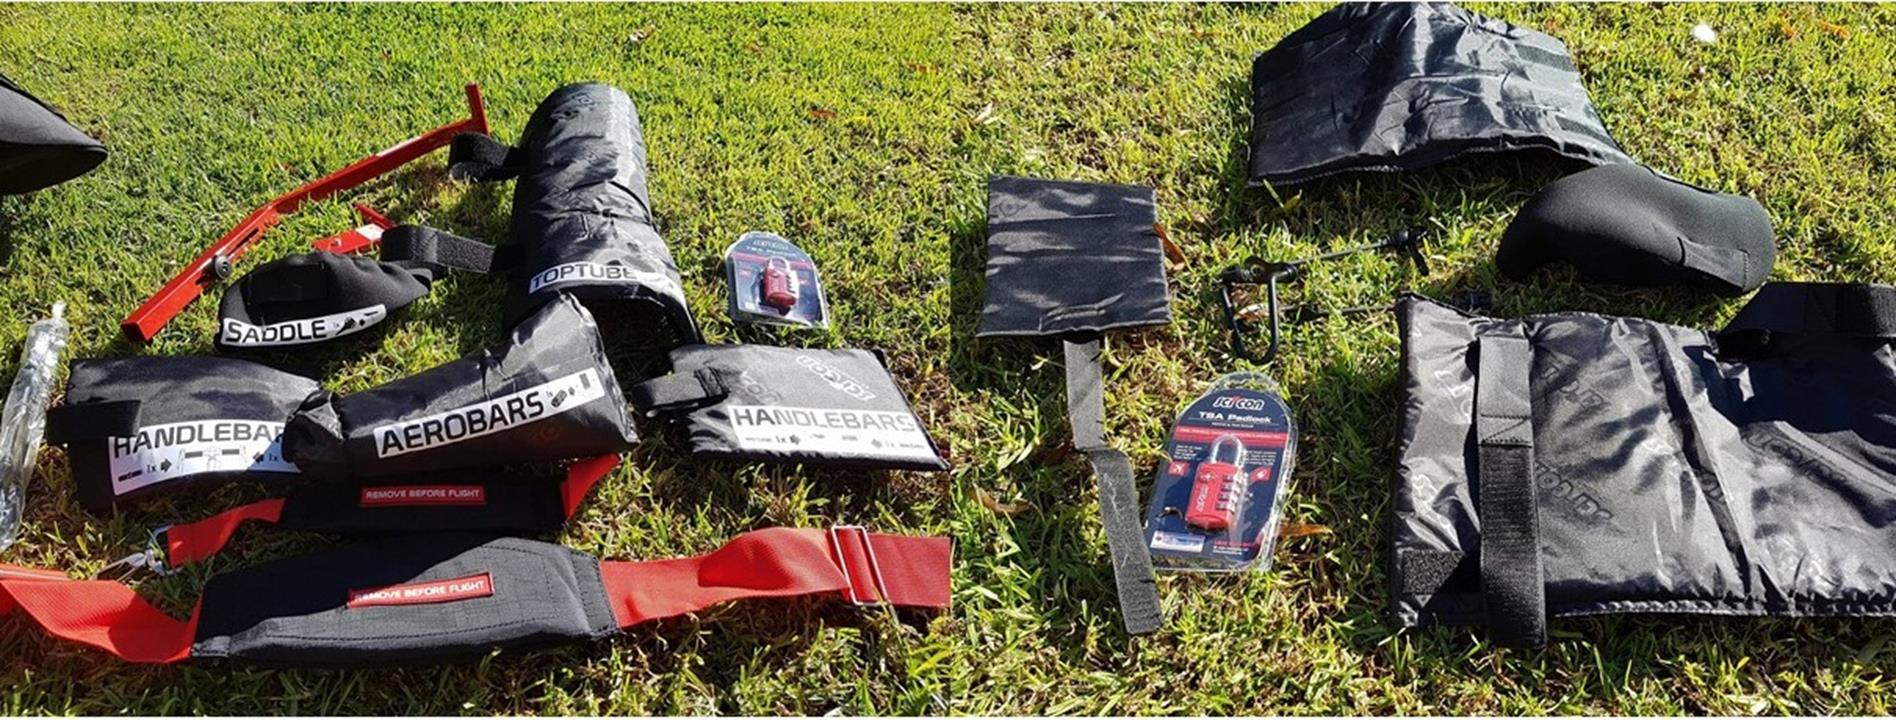
The Scicon Aerocomfort 3.0 now comes with clearly labelled top tube, seat and aero bar protectors which is a welcome addition. But this leads to my biggest gripe with this bag – the lack of frame padding that comes default with the bike.
Scicon sells a series of additional padding options to cover the seat post, forks, aero brakes, and importantly the drive chain. I suggest that you invest in each and every one of these. The problem is, even on sale this can add another $200 to the overall cost. I would like to see Scicon include more of these options by default in the base bag in future releases.
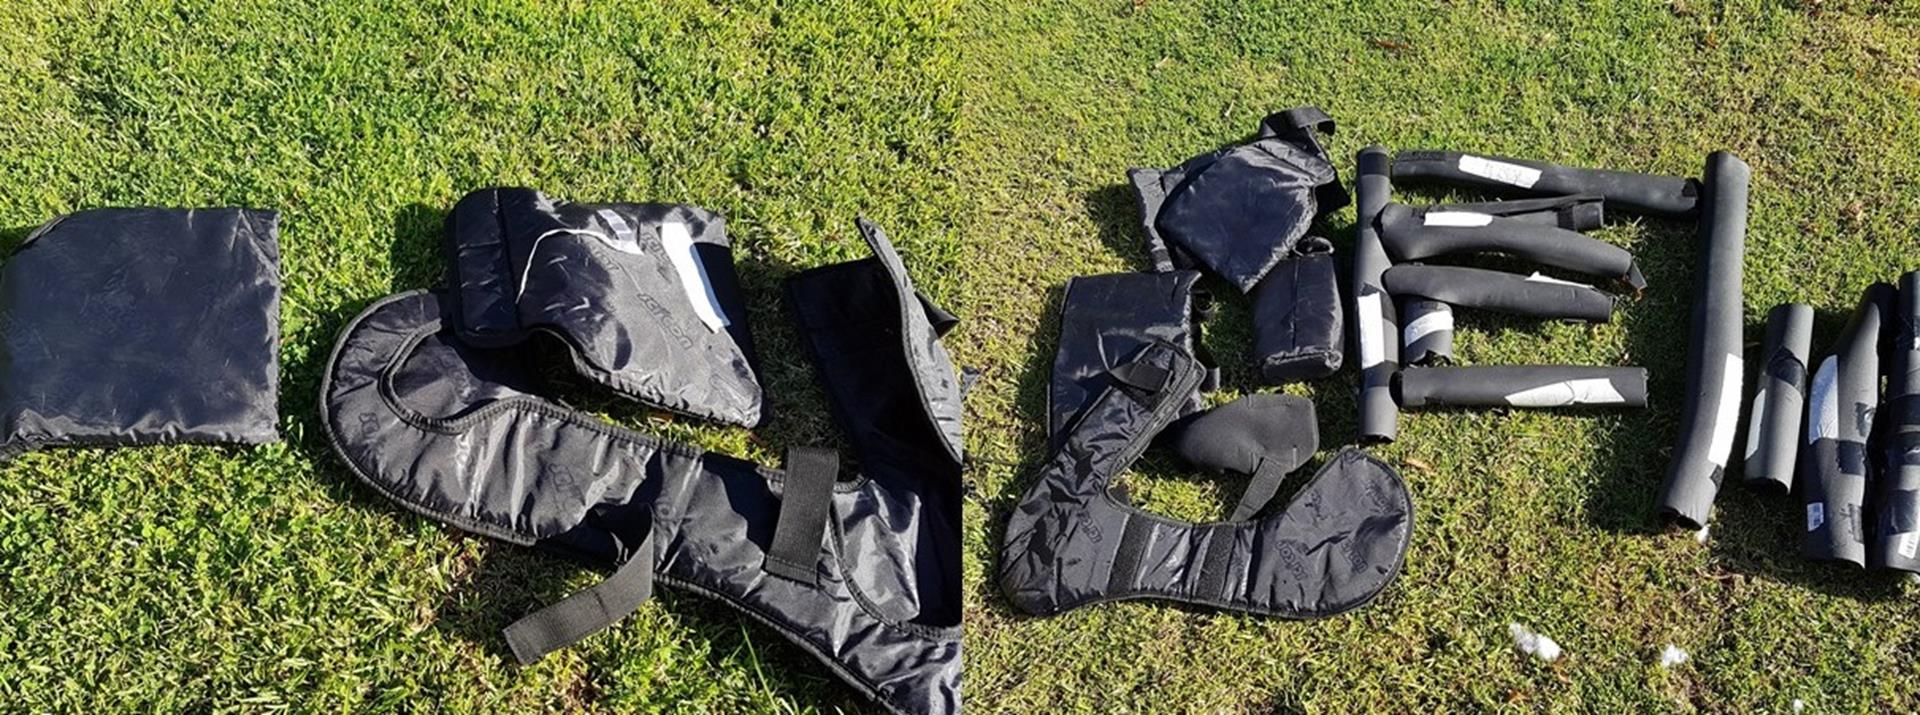
Given these bikes cost around the price of a small car, many of us with these bags also create additional padding to help cover almost 100% of the frame. Maybe overkill but the safety of a loved one is surely worth it.
So, would I recommend it as an upgrade? Well perhaps. The Scicon Aerocomfort 3.0 improves over the 2.0 in all areas, particularly securing the forks to the frame and in its mobility. So if your travel bag is getting a bit old in the tooth, it’s certainly worth an upgrade. However, I would be hard pushed to say that any of the features warrant a must upgrade recommendation.
Would I recommend the Scicon Aerocomfort 3.0 to someone who is considering travelling with their bike for the first time? Absolutely. Although the price of the bag at retail is twice that of some of its competitors ($949 AUD, with most of the competition around the $500 AUD mark). Its build quality and integrated protection are top of the line. It’s worth noting, though, that you can still pick up the Aerocomfort 2.0 on sale for $550 AUD. This, with only a few lesser features, is the smart buy.
All in all a great travel bag with advanced features, sure to get you to the start line with your precious intact. Just remember the additional padding required and nuisance of protecting your components and frame.